Beautiful Lemon Pistachio Cake With Lemon Frosting:- Every year around Valentine’s Day, I want to share a brand new recipe for an excellent cake with you so that you might be able to share it with your loved ones, friends, and family. It takes more time and effort to bake a cake than it does to bake a batch of cookies or brownies, but there is something so satisfying about topping a homemade cake with icing that you have created from scratch and displaying it off for any occasion.
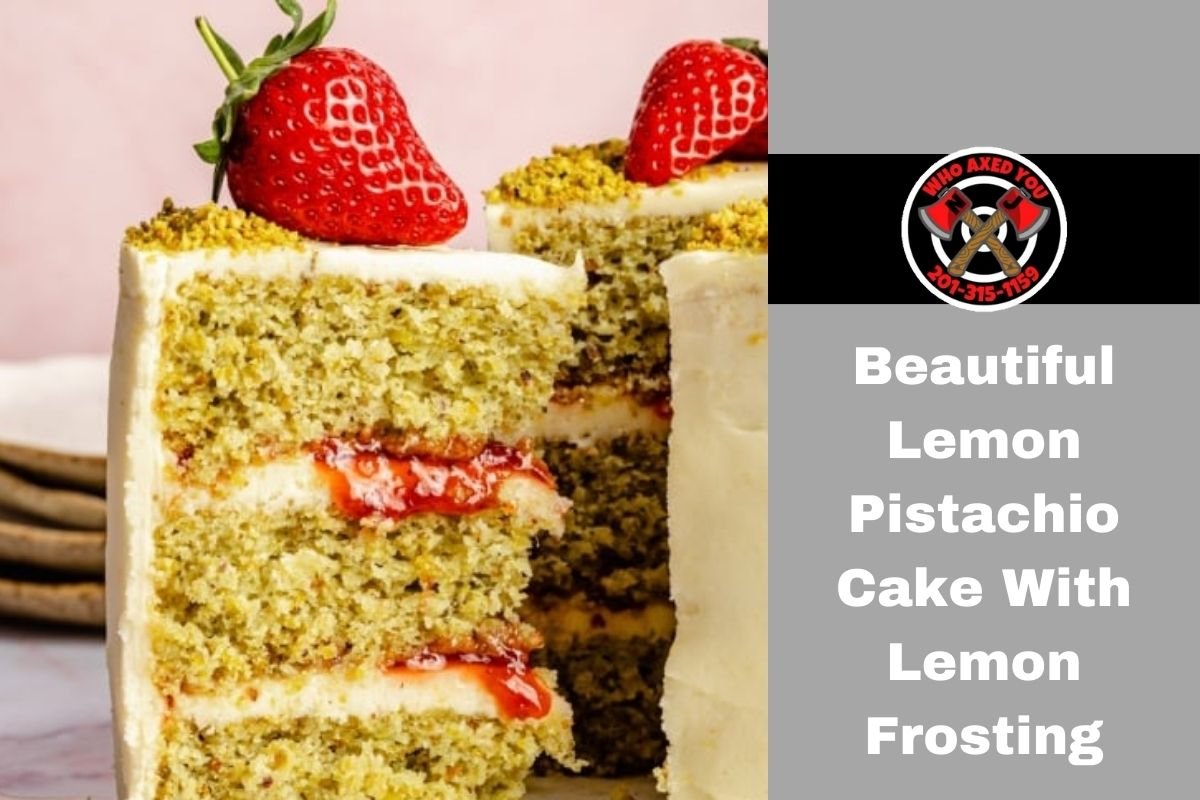
Beautiful Lemon Pistachio Cake With Lemon Frosting
This gorgeous lemon pistachio cake has a tender crumb, the ideal amount of sweetness and brightness, and it is topped with the most wonderful lemon buttercream frosting anyone has ever seen. This is a wonderful way to make use of citrus that is in season while also bringing a little bit of sunshine into the winter months. Also, did I mention that it is free of gluten and may be readily substituted for dairy products? If I had tried this recipe a year ago, I would have included it in my cookbook without a doubt. That is how delicious it is!
Ingredients
- Dry ingredients:
- 1 cup (135g) roasted shelled pistachios*
- 1 ½ cups (169g) fine blanched almond flour
- 1 cup (95g) oat flour, gluten free if desired
- 1 teaspoon baking powder
- ½ teaspoon baking soda
- ½ teaspoon kosher salt
- Wet ingredients:
- Zest from 2 large lemons
- 1 cup (200g) granulated sugar (I use organic cane sugar)
- 4 large eggs, at room temperature
- ½ cup (113g) plain or vanilla whole-milk Greek yogurt
- ¼ cup (50g) fresh squeezed lemon juice
- 1 teaspoon almond extract
- For the cake:
- 1 batch Lovely Lemon Frosting
- 6 tablespoons low sugar strawberry jam (or sub blueberry!)
- Strawberries (or berries of choice), for topping
Instructions
Bake at a temperature of 350 degrees Fahrenheit. Prepare the bottom of three round cake pans measuring 6 inches or two round cake pans measuring 8 inches by lining them with circles of parchment paper. Application of nonstick cooking spray to the sides of the pans and the parchment paper is recommended.
If you neglect to use parchment paper, the cakes will adhere to the pan. So make sure you don’t forget to use it. Get the pistachios ready: Place one cup of pistachios in the bowl of a food processor and process them on high speed for approximately thirty seconds to one minute, or until the pistachios are ground to a fine consistency.
Also see :- 8 Health Benefits Of Ginger Lemon Tea
If you want to decorate the cake later, set aside one to two teaspoons of ground pistachios and reserve them beforehand. In a mixing bowl, combine the dry ingredients: Pistachios should be added to a large bowl, with the exception of the one to two teaspoons that have been set aside.
Next, almond flour, oat flour, baking powder, baking soda, and salt should be whisked in. The wet elements should be mixed together: Place the sugar and lemon zest in a separate big basin. Using clean fingers, press the lemon zest into the sugar for one minute.
This will combine the two ingredients. Because of this, the sugar will start to take on the flavor of lemon. Following this, add the eggs, yogurt, lemon juice, and almond extract, and mix until everything is completely smooth and thoroughly incorporated.
Mix the dry ingredients thoroughly with a wooden spoon until they are completely smooth after adding them to the wet ingredients. If you want it to be more fun and green, add one to two drops of food coloring that does not contain any dye.
Prepare the cakes by baking them: The batter should be distributed evenly amongst the pans, and then the tops should be smoothed off with a spatula. The two 8-inch pans should be baked for 18 to 25 minutes, while the three 6-inch pans should be baked for 22 to 28 minutes.
After twenty-five minutes, my pans measuring six inches were ready to use. When a tester is removed from a cake and has only a few crumbs clinging to it, the cake is ready to be served. First, the cake should be allowed to totally cool before being removed from the pans.
Prior to applying the frosting, the cake must to be at room temperature. This is a really significant point. Cakes can be prepared the day before if you so like, and then stored in the refrigerator neatly wrapped and individually wrapped.
In accordance with the recipe provided below, prepare your icing. To decorate the cake: Amount of approximately one to two tablespoons should be placed on the cake stand and spread out. In order to make the cake easier to remove, run a butter knife around the sides of the pan.
Next, invert the cake onto the cake stand so that the flat side is facing up. Next, pour approximately half a cup of frosting and spread it toward the edges of the cake. The strawberry jam should be placed on top of the frosting using a knife, leaving a border of about ¼ inch.
If you are using 6-inch cakes, add 3 tablespoons of strawberry jam, and if you are using 8-inch cakes, add 6 tablespoons of strawberry jam. This will ensure that the jam does not squeeze out of the cake. After placing the next layer of cake on top of the first layer with the flat side facing up, repeat the process, this time topping the cake with an additional half cup of frosting and spreading it all the way to the edge.
Using a cake that is 6 inches in diameter, add an additional three tablespoons of strawberry jam on top. After placing the third layer, if you are using it, on top of the cake with the flat side facing up, proceed to frost the top and sides of the cake with ½ cup of frosting.
Utilizing a bench scraper or offset spatula, make a layer of frosting that is uniform and very thin all around the cake. In order to accomplish this, it is helpful to spin the cake stand slowly while simultaneously applying gentle pressure on the scraper against the side of the cake.
This stage, which is referred to as a crumb coat, will, once finished, make it possible to achieve a beautiful and smooth appearance. Place the cake in the refrigerator for fifteen to twenty minutes, or until the layer of frosting that is being used for the crumb coat has become firm to the touch.
After the cake has been chilled, you should use an offset spatula to repeat the procedure of frosting the top and sides of the cake with the remaining frosting. Considering that the cake has been refrigerated, the crumb coat ought to be able to facilitate a smoother result.
There is no need to worry about the cake being a little “naked” on the outside because it is going to taste quite wonderful! Add a sprinkling of ground pistachios that have been kept for garnish. The fresh strawberries (or mixed berries) should be placed in the middle of the cake right before it is served.
This will ensure that the strawberries remain as fresh as even feasible. Store: Consume the cake right away, or store it in the refrigerator for up to five days, making sure to cover it completely to maintain its freshness.
Nutrition
- Per Serving
- Amount
- Calories452
- Protein8 g
- Carbohydrates54 g
- Total Fat24 g
- Dietary Fiber1 g
- Cholesterol96 mg
- sodium304 mg
- Total Sugars34 g
Notes
Refer to the blog page for information on how to freeze the food. To achieve a flavorful punch, I used roasted and salted pistachios; however, you are free to use roasted pistachios that have not been salted.